If you’ve read any of the other articles on Green Old Home, you might have noticed a theme: I don’t want you to have to do your work twice. That’s why we have an article called, for example, “How to Caulk for Durable Seals,” and another discussing whether caulk or spray foam are more durable in different applications. Once you’ve sealed your attic floor and covered it with insulation, you shouldn’t have to think about it again.
So why would I offer you an article on making seals that are temporary?
Well, sometimes it’s not obvious how to make a durable seal. And in other cases, it’s clear how you could do it, but the project would involve a lot more work than you can take on right now. Here are a couple of examples:

These double-doors are pretty banged up, but focus on the area where the flush bolt should be (the piece of hardware that slides down into the threshold to fix the left door shut.) The rest of the doors were pretty well sealed with weatherstripping, but cold air kept rushing in where the hardware was missing. Obviously replacing the hardware is the right way to do this, but finding a bolt to match the one at the top (not shown) could take a long time. What to do in the meantime?
Here’s another example:
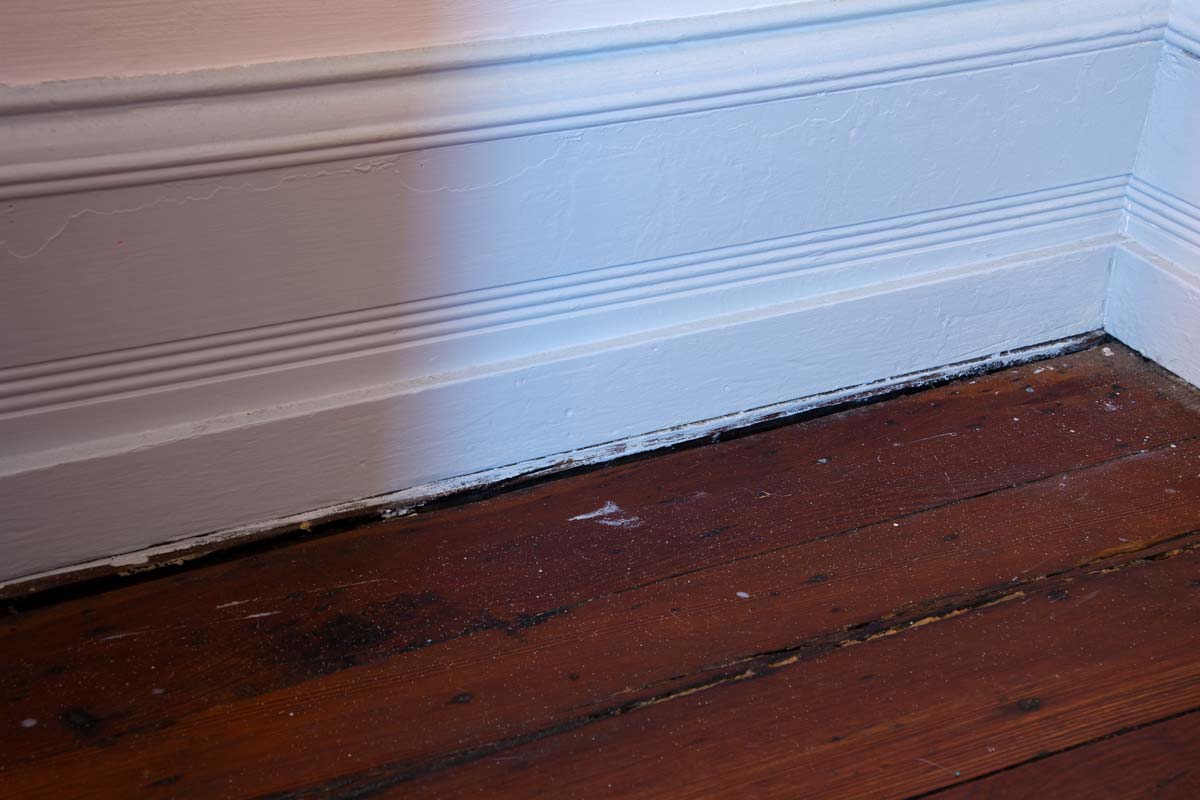
This is the gap that inspired me to write this article. When temperatures dropped here last week, I finally noticed this gap below the baseboard, which is usually hidden behind a door. What you’re seeing is actually a gap between two floorboards—most of the boards have settled a little bit, but the one that runs below the baseboard stayed put, resulting in a gap. And because this is an outside wall, cold air was pouring in from the uninsulated wall cavity. Compared to the last example, it’s much less clear what the ideal way to seal the gap is. Caulk or spray foam would make this area look even worse than it already does, and a proper floor repair would probably be pretty invasive.
In both of these examples, the solution is not to do nothing. If you’ve noticed an air gap—either because you felt a draft when going about your daily life, or during a deliberate assessment of your thermal envelope—you should do something about it as soon as practical. Especially if you’re in heating or cooling season, every day you wait is costing you money and energy.
When I need a quick and temporary solution to buy myself time to figure out how to “properly” deal with a leak, there’s one product I come back to time and time again. It’s easy to use, dirt cheap, and completely reversible.
Felt Weatherstripping: The Stopgap Gap Filler
If you’ve never seen it, felt weatherstripping is exactly what it sounds like: densely matted fibers in a narrow strip of fabric. The fibers in felt are so dense that they form an effective air seal. Felt is one of the oldest types of weatherstripping available, and it still has advantages over its modern competitors.
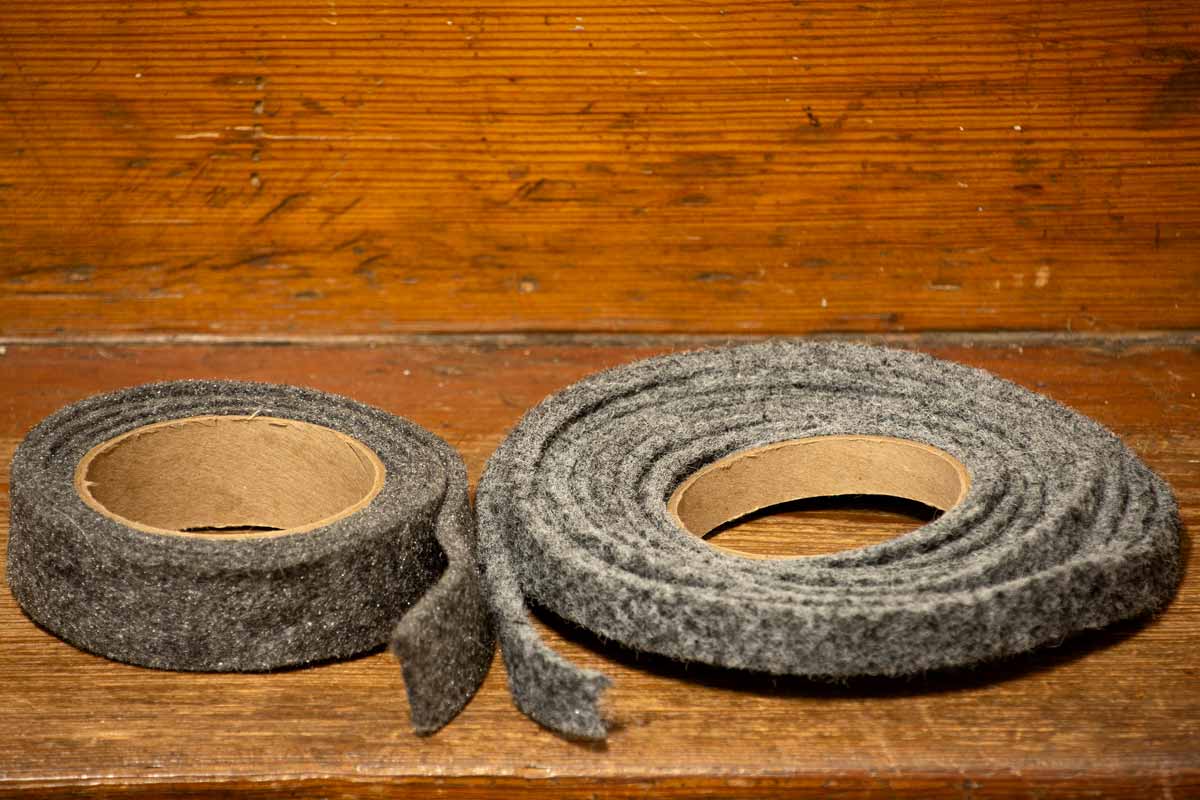
Like most weatherstripping, felt comes in 17′ rolls, which are long enough to seal the perimeter of an average door. And you can certainly use felt to seal your leaky doors (though there are other good options). But what I’m really recommending is that you use felt weatherstripping “off-label”: to temporarily fill pesky gaps and cracks around your house that you can’t figure out how to seal any other way.
Felt is perfect for all kinds of weird air sealing projects because it’s flexible, foldable, and compressible, which allow it to adapt to lots of different gap sizes. And it’s perfect for temporary projects because it can often be installed without any fasteners or adhesive, meaning it’s completely reversible—and therefore reusable. Think about that. You can buy a roll of felt for less than $3 and use it again, and again, and again as a stopgap gap filler while you figure out long-term solutions for your trickier air sealing problems.
Types of Felt Weatherstripping
You can buy felt in both self-adhesive and “nail-on” varieties. You’re welcome to use the adhesive type if it makes sense for your situation, but for most temporary jobs I recommend buying the nail-on type, which isn’t sticky. That’s because our goal is to be completely reversible and minimally invasive. We’re not going to nail it, either—we’re just going to wedge it in place.
Both of the two major weatherization product manufacturers that you see in the big box stores, M-D Building Products and Frost King, make several sizes of nail-on felt weatherstripping. However, I usually see just one product from each company on the shelves (affiliate links):
- A wide Frost King felt (1-1/4″)
- A narrow M-D felt (5/8″)
Both felts are nominally 3/16″ thick. However, in my experience the Frost King felt feels slightly thinner—or maybe more compressible—than the M-D felt. The point is, you might be able to insert the Frost King into a gap where the M-D won’t fit.
Sizing felt and other types of weatherstripping can be tricky because they’re compressible, but one of the nice things about felt is that it can be folded to make “in-between” sizes. The best thing to do is just have a couple of rolls of different sizes on hand—again, they’re super cheap—and see what fits as you’re working.
How to Use Felt for Temporary Air Seals
You don’t need many tools or materials to make temporary air seals with felt (note that this list includes affiliate links):
- A couple rolls of felt in various sizes*
- Scissors
- Plastic putty knives to push in the felt. You can also use something like a credit card. Just don’t use a metal putty knife or anything that could pierce the felt.
- Maybe a vacuum to clean out your gap before filling it with felt. (I use this small handheld HEPA vac because I assume I’ve got lead dust in places that haven’t been cleaned for ages.) This isn’t a case where you’re worried about adhesion, but if you remove your felt later and it’s covered in dirt and dust you’re probably less likely to reuse it.
*I’ve had mixed success in finding different felt sizes on Amazon at the normal price point of under $3/roll. Price and availability seem to vary, possibly because no one is getting rich selling you felt the normal way. If a size you want is coming up more expensive, you might want to check your local hardware store or the website of one of the big box stores. (I say “the website” because sometimes I’ve had to order felt to be shipped to the store.)
Installing felt without fasteners is really simple:
- Do a test fit for thickness. I like to fold my felt in half “hot-dog” style to create a little more tension to keep it in the gap. Before you cut any felt, see if you have some that will fit folded up. If not, use the thickest felt you’ve got to install “straight.”
- Cut a strip of felt to the length of the gap.
- Stuff it in the gap with your putty knife. If you’re making a good seal, it should resist a little—making the putty knife helpful.
- If it looks ugly, remove and trim the felt and reinstall. If you’re using the wide stuff, you can often cut it by 1/3 or 1/2 in width and still fold it into place. If you’ve done everything you can and it still bothers you, keep in mind that you’re focusing on it. This is a situation where you can walk away for a few days and see if it’s still jumping out at you—the felt will be just as removable next week as it is today.
Here’s how those two leaks at the top of the article look with a little bit of felt folded into the gaps:
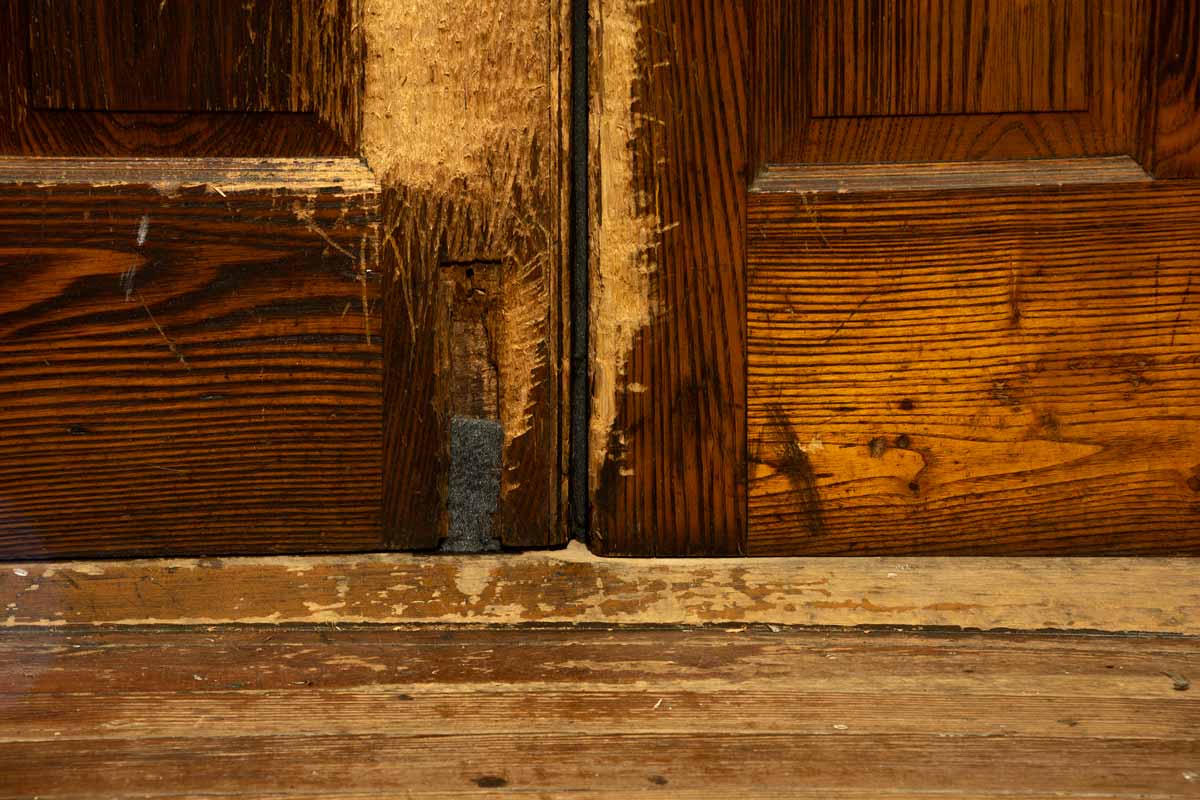
The door on the left is usually fixed shut, so I was able to tuck a piece of felt into the slot for the flush bolt in the threshold, and then fold the felt into the recess for the bolt in the door. Took about 30 seconds to create a pretty perfect seal.

Due to changes in the width of the gap, I filled this one with a combination of thicker felt installed “straight” (on the far right) and slightly thinner felt folded in half. The felt isn’t as well tucked in at one location because of a nail. If you prefer, you can cut your felt to fit on either side of the nail in a situation like that.
Do I absolutely love the way these seals look? Sure I don’t. But the original gaps weren’t exactly photogenic either. And in truth, I noticed them a lot more back when cold drafts would pour in through them than I do now with my eyes. Keep in mind all of these photos have been pretty zoomed in, and are brighter than how my dark old house really looks. Here’s what that same floor seal looks like from eye level:
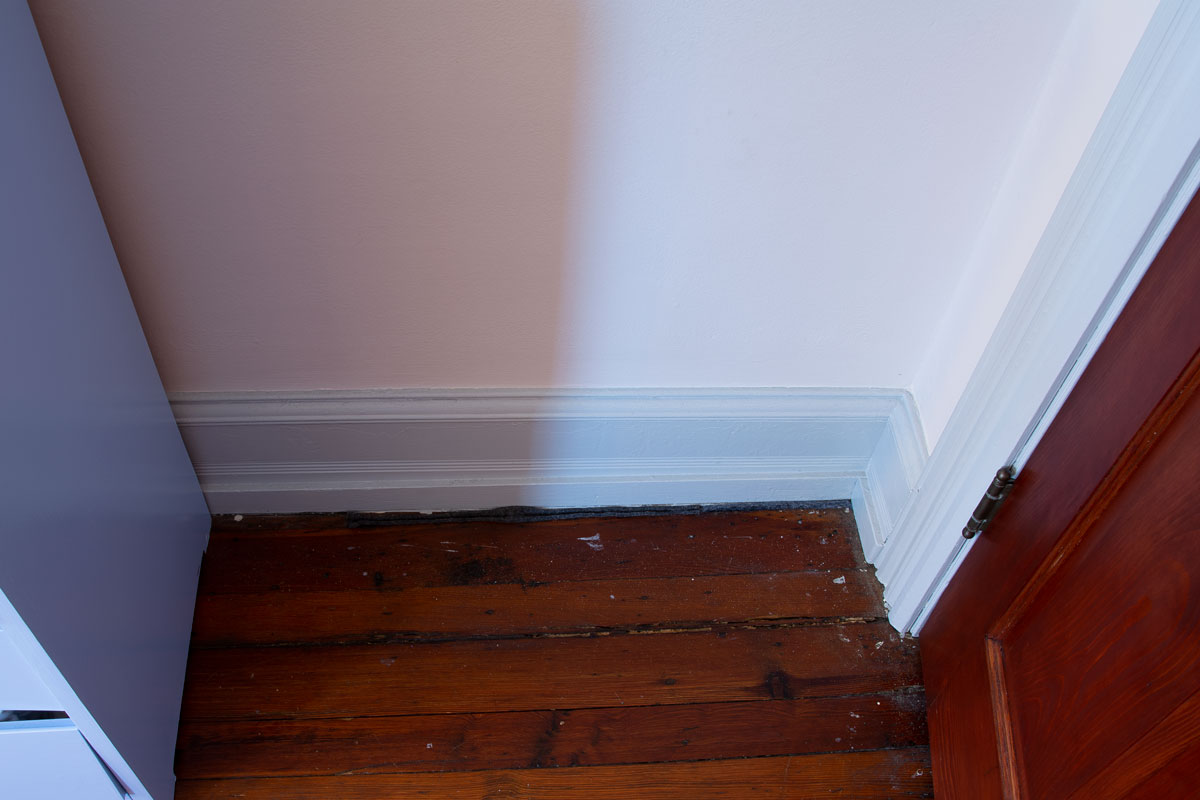
I’m not sure your eye would jump to that felt if you weren’t looking for it. And as I mentioned, this area is usually hidden behind that door. Which is how I missed this gap in the first place!
Drawbacks to Felt Weatherstripping
The way I see it, there really aren’t a lot of drawbacks to felt weatherstripping, at least when used in this temporary way. To me, any cons are dramatically outweighed by the pros of cheapness, effectiveness, and reversibility.
However, we’ve already touched on one potential drawback to felt—appearance. As the examples above illustrate, one of the main reasons you might find yourself reaching for a roll of felt is that you have an air leak in a finished part of your house where using caulk or spray foam just isn’t a good option. And for those same reasons, you might find yourself hesitant to have a strip of felt visible all the time.
All I can say to that is that you have to consider the felt in light of your other available options. If the alternative is to leave a big gap in your thermal envelope, I’ll take the visible felt any day. But if you can find a better way to seal the gap, by all means go for it! Just keep in mind that felt is a great option for temporarily plugging your leaks in the days, weeks, or months before you come up with your better solution…
Finally, the other drawback to felt that I’ve personally experienced is that cats love it. If you have cats, you may find that your felt seals are even more temporary than you originally intended. Felt is sturdy enough stuff that I’ve never seen it shredded up, but I’ve definitely found long strips of it lying around where it shouldn’t be. I don’t see this as a big issue, particularly because you can reinstall felt in about 2 minutes. But if you have any cats, be forewarned.
In Conclusion
Air sealing your house just means stopping or dramatically reducing uncontrolled airflow across your thermal envelope. There are no particular products you need to use, no technical specifications you really need to worry about. If you’ve plugged a leak, you’ve just air sealed—so feel free to get creative. In fact, we’d love to hear about your creative air seals in the comments or on our contact page.
But I think you’ll find that in many tricky air sealing situations, good old-fashioned felt is hard to beat.
