This article explains the first of three concepts that you need to understand if you’re serious about saving energy—and money, and frustration. If you started with the first post, you know that my goal is to help you learn how to think about your house so that you can make the right decisions about what improvements to make. You can find a ton of articles and videos on the internet telling you how to do stuff, and Green Old Home will have plenty of those articles for you too. But knowing how to do the wrong project doesn’t do you much good at all.
But isn’t every little bit you weatherize your house a good step in the right direction? Well, sure. But if you’re like most people, you have limited funds, and no matter who you are, you certainly have limited time. So let’s focus on the projects that are going to save you energy the fastest and pay you back the quickest—because every dollar after that goes straight to your pocket. And how are you gonna choose those projects, when every old home is different? Well, that’s why you need to know these three concepts.
So now that I’ve convinced you, what’s the first concept? What’s the absolute most important thing you need to understand in order to really start saving money and energy? Write this down:
Your thermal envelope is the border between the spaces you pay to heat and cool, and everywhere else.
Be honest:
Are you a little disappointed? Does that sound too obvious? Did I just describe…the outside walls of your house?
Well, maybe I did—if you live in a house with no basement and no attic and no garage, and you use every room in your house, and there’s a heating or cooling vent in each of those rooms, then yes. In that case, your “thermal envelope” is basically a fancy term for your floor, walls, and roof.
But I suspect that if you stop and think about it, there are parts of your house that you are not paying to heat or cool—at least not on purpose. I just mentioned some of the main ones above: unfinished basements, attics, and garages are not normally “conditioned spaces” (meaning no heating or cooling devices are present). But you may have other unconditioned spaces, such as a vestibule or an enclosed porch. You could even make an argument that any rooms in your house that you don’t regularly use are outside your thermal envelope. We have two rooms in our house that we don’t regularly use in the winter, and so I do my absolute best not to heat them.
Because that’s the point of this exercise: your greatest energy savings are going to be from keeping your conditioned air (heated or cooled) inside your thermal envelope. Every little bit that leaks out into your vestibule, your empty guest room, or worst, the great outdoors, is costing you money and energy. And that should really bother you.
Let’s Practice
Try your hand with an example from a book of house plans from 1930. Take a look at the floor plans and see if you can figure out which spaces are inside the home’s thermal envelope, and which aren’t:
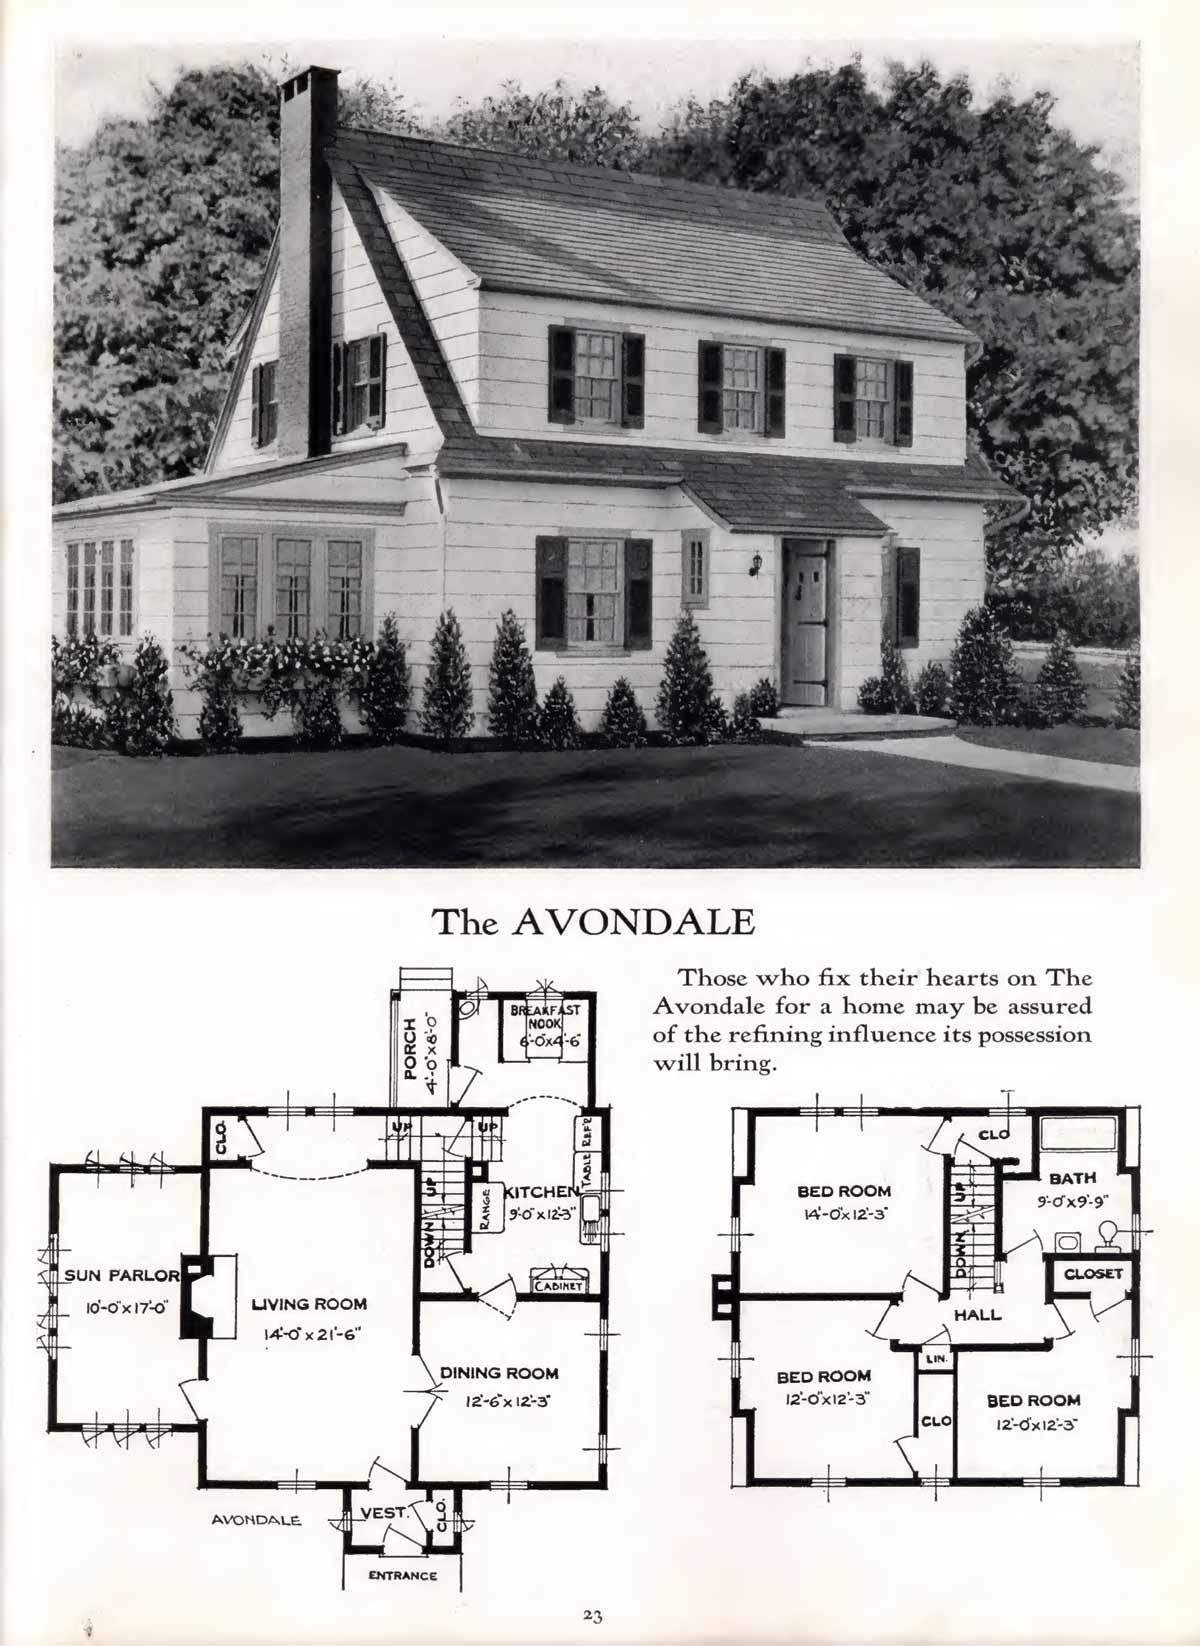
Alright, what do you think? Now, obviously we don’t know much about this house, such as where there are radiators or heating vents, but we can make some educated guesses. Below, I’ve highlighted the areas are most likely the house’s “conditioned spaces”—i.e., inside the thermal envelope.
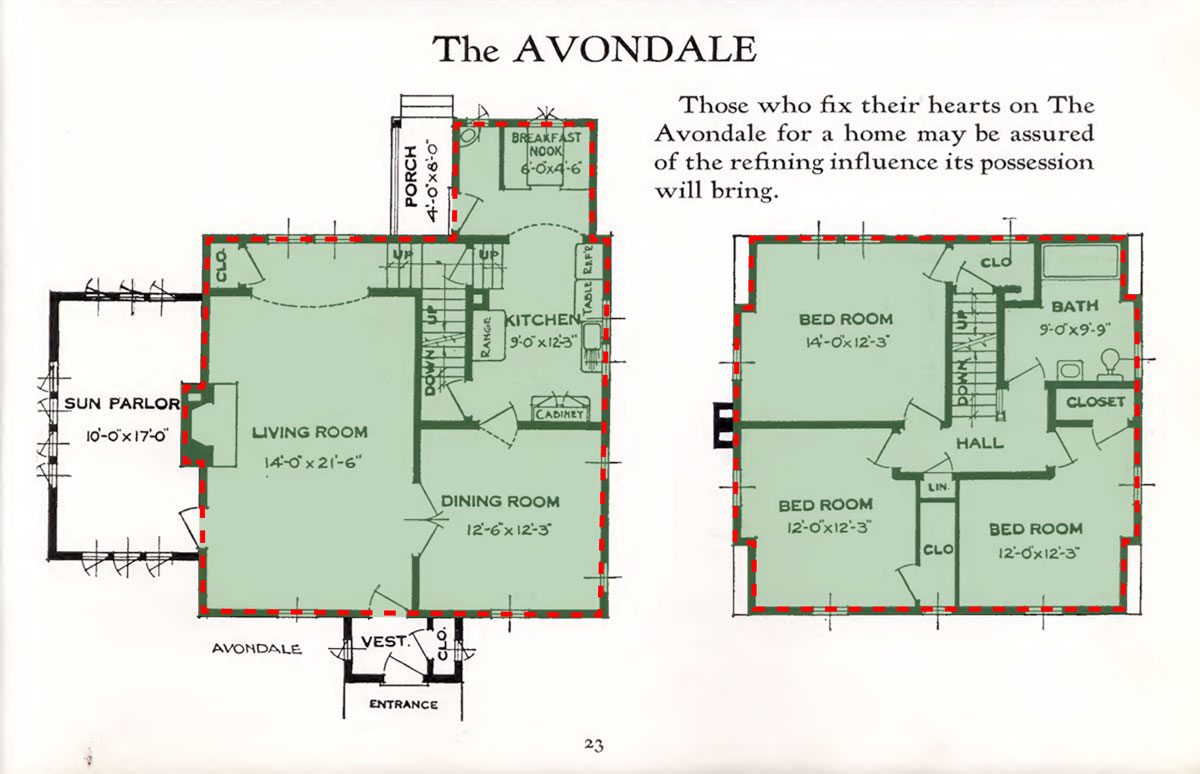
I suspect the vestibule, sun parlor, and back porch of this house are all unconditioned spaces outside of the thermal envelope. If this were your house, your goal would be to not heat or cool those three rooms, in addition to the house’s basement and attic (note the stairs going down from the first floor and up from the second). The walls with the dashed red lines would be part of your thermal envelope, and where you’d be focusing a lot of your attention going forward.
You might also notice how the first- and second-floor conditioned spaces more or less stack on top of one another. That’s a good design feature. Any heat that escapes from the first-floor spaces will just end up in one of the conditioned second-floor spaces. And nobody’s bedroom is located on top of an unheated vestibule, unlike in my own house! But I bring this up to mention that you’ll need to be thinking in three dimensions when you’re thinking about your thermal envelope. The ceiling of that breakfast nook hanging off the back of the first floor? There’s nothing above it but the great outdoors, so that ceiling is a critical part of your thermal envelope.
Try This at Home
On that note, are you ready for your first “project”? Do yourself a favor and spend 30 minutes tonight just walking around your house with a notepad, really focusing on this thermal envelope concept:
- Figure out which rooms are inside your thermal envelope (“conditioned spaces”) and which aren’t.
- Identify every floor, wall, or ceiling that forms the barrier between a conditioned space and an unconditioned space. At a minimum, make a list (“bedroom ceiling,” “kitchen wall to shed”), but see if you can sketch this barrier—the line you are drawing is your thermal envelope.
As you’re doing this, you will almost certainly start to notice some problems. Many of the floors, walls, and ceilings in a typical old home won’t exactly strike you as effective “barriers” to anything. And you’re probably on the right track. Make mental notes, but don’t worry about fixing anything just yet. First, we’ve got more crucial concepts to cover.
Next up: let’s head outside to grill.